Category Archives: Hardware Projects

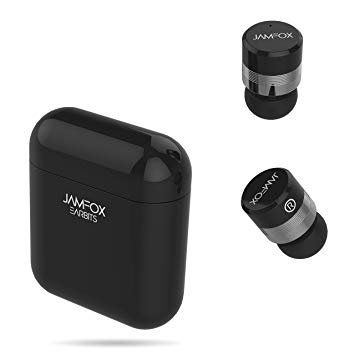
JAMFOX earbits

A few weeks ago, my trusted BT headphones broke. I had them for about a 1.5 years and I was very happy with them.

They were comfortable and quality was great and they were omni-present to the point where I forgot I was wearing them around my neck.

 
I charged them up once in the morning and when I returned from work they could still give me company until bedtime. Obviously not un-interrupted.

Then one day the left side speaker gave out. It was the cable. In my younger days I would have fixed it with my soldering iron but as you grow older you tend to value your time more and so I decided to get a pair of new bluetooth headsets. 

JAMFOX Earbits

Wireless headphones have shrunk down to the point where they have been renamed to earbuds. Well JAMFOX thought earbits may be more along the lines of their marketing strategy and indeed those speakers are tiny bits of Bluetooth technology.

You get two bluetooth devices which connect to your phone. You can also use them individually. For example, you could loan one to your friend and keep the other one connected to your phone.

A fun experiment is to connect them to different phones and listen to both at the same time. Absolutely the best solution for people with multiple personality disorder.

In my case I was more the normal user and wanted to listen to music most of the time, talk on my phone, and also have the ability to use only one side to have the second ear available for my colleagues at work while I am in the kitchen eating lunch. 

Setup and usage.

In order to pair the set to your phone you have to only pair the JAMFOX-L and ignore JAMFOX-R. That is you do not need to pair the right side with your phone. The Left earbit will connect to the right earbit and thus allow you to listen to stereo.

The bits both come with built in microphones and allow you to do a normal phone call. They behave as you would expect, which means they will stop playing your music or video when a call is coming in.

Another great thing about those little gems are the touch sensors sitting on top of each earbit. They are used to pause / play, as well as increase and decrease the volume through double-tapping the left of the right bit.

Troubleshooting

I used them the first 4 weeks without any issues and eventually I gotten myself into the situation where I could only listen to the left earbit OR the right one but not to BOTH at the same time.

Searching online did only reveal a set of instructions which did not work for me but eventually I figured out how I could get stereo back:

I could fix it by

  1. unpairing from my Android device ( Nexus 6 )
  2. pairing it with another phone ( Remember to only pair JAMFOX-L, and ignore the right channel ). Stereo came right on.
  3. I then unpaired it with the second phone and could
  4. finally get stereo back on my Nexus after re-pairing JAMFOX-L

I hope this helps people with similar problems.

Conclusion

Those are great earbuds / earbits / headphones to have and they are well worth the investment. The battery pack will allow you to basically survive the whole day without the need to plug in.

The sound quality is the only thing which could be better however this is mostly due to the size of the speaker and I would not expect them to of the same quality as a full sized headset.

Please share your experience with them if you have the same set of earbits.

Wrapping it all up

Building a video doorbell requires little more than curiosity, a good grasp on software and very basic know-how on hardware.
For example, I did not even have to design or solder a single circuit so far, as the Raspberry PI Zero W allows you to use its internal pull-down or pull-up resistors.

For the past two weeks I have been working on building a Video Doorbell. I build all the pieces, connected the electronic side, and installed OS and software packages. Now we are starting to see results.

Video Doorbell Chassis:

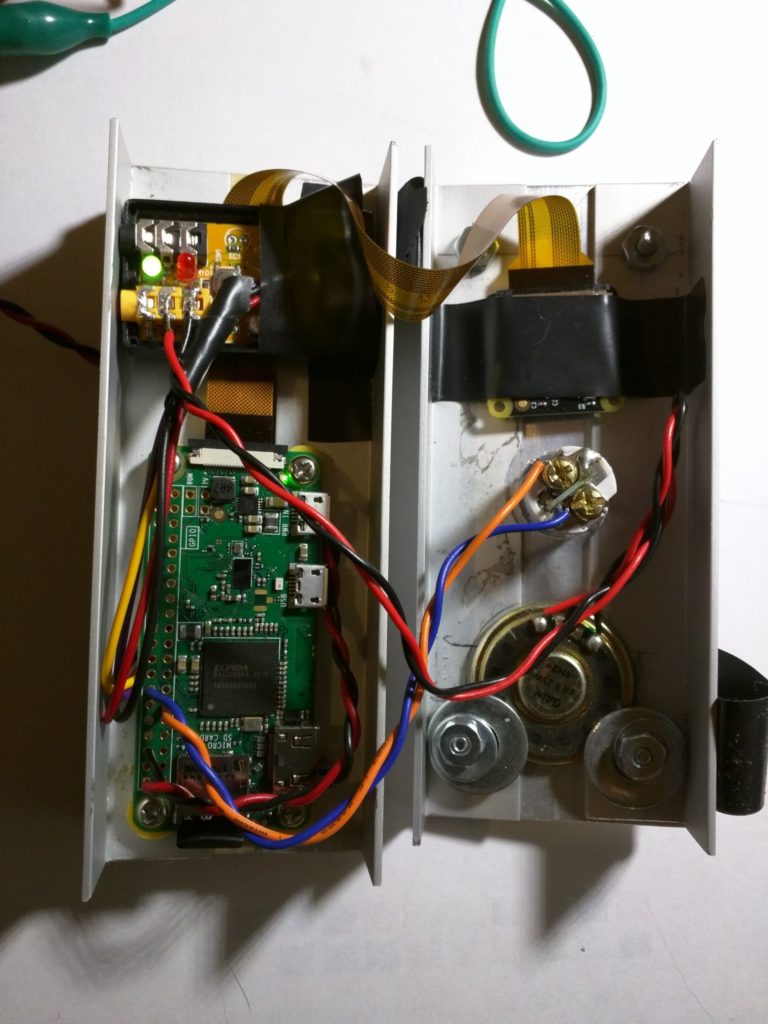
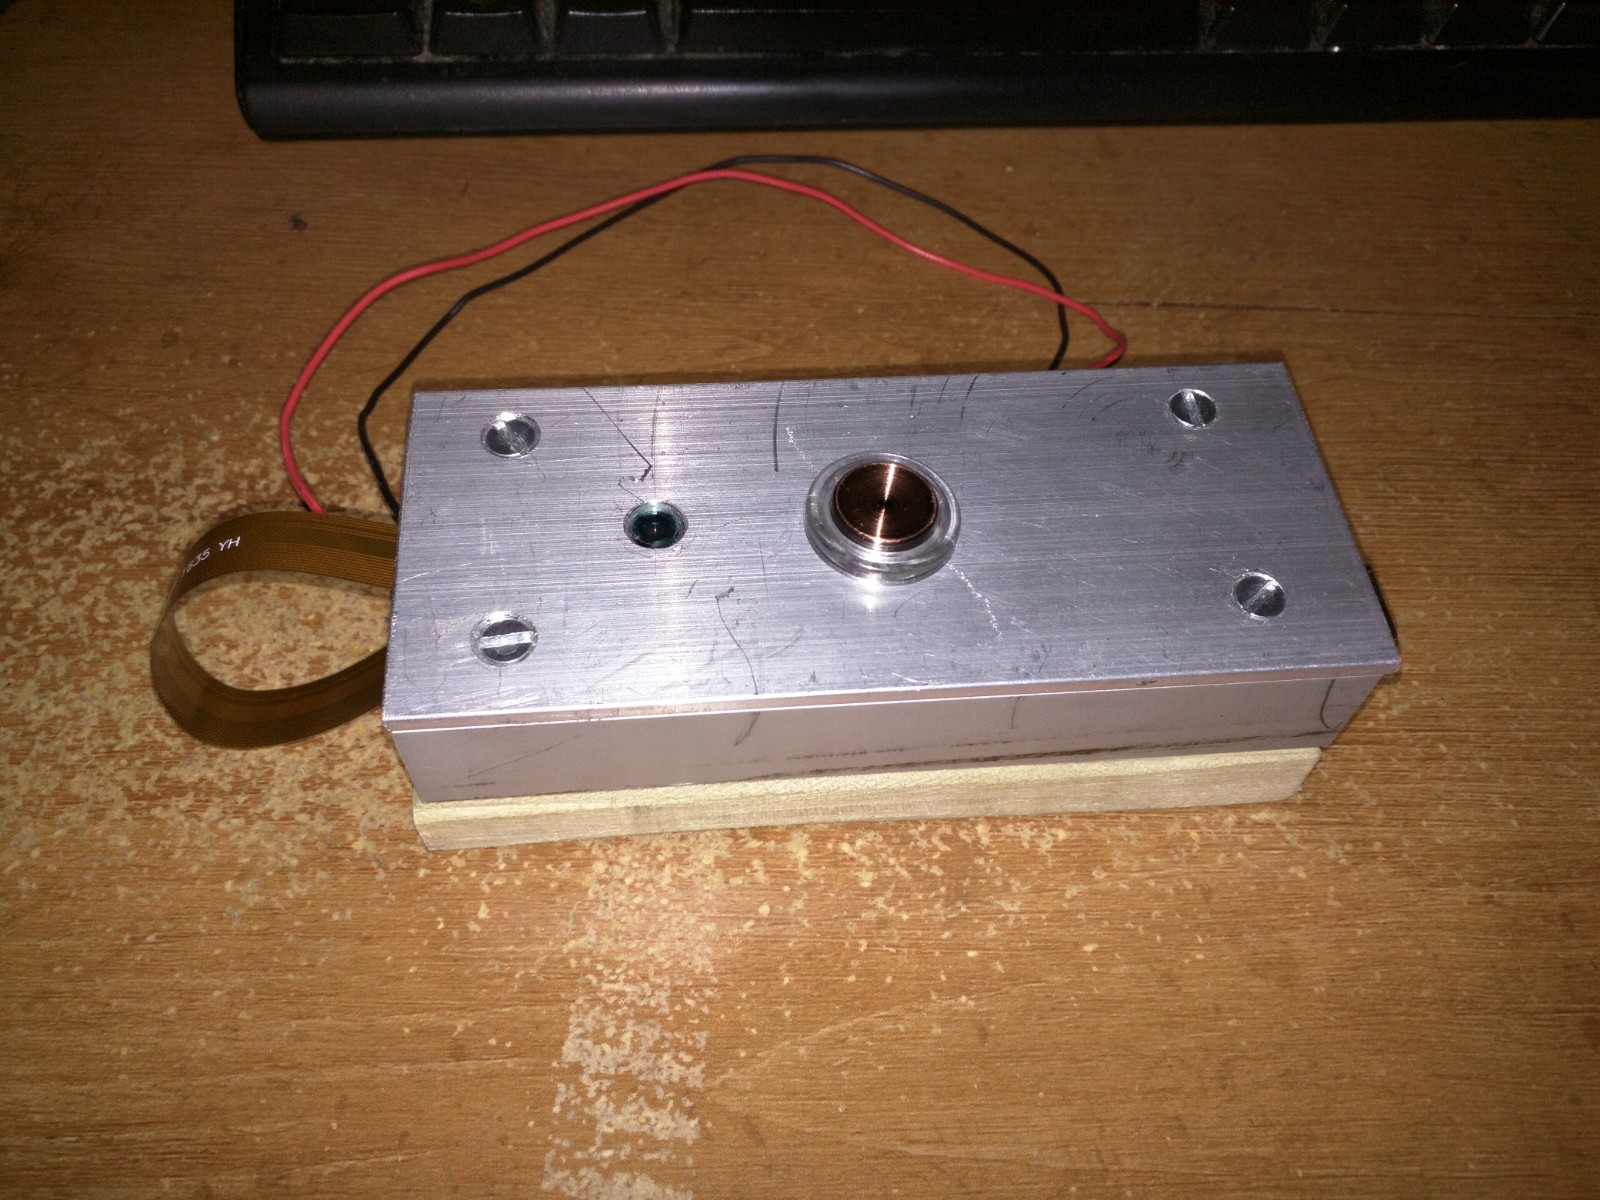
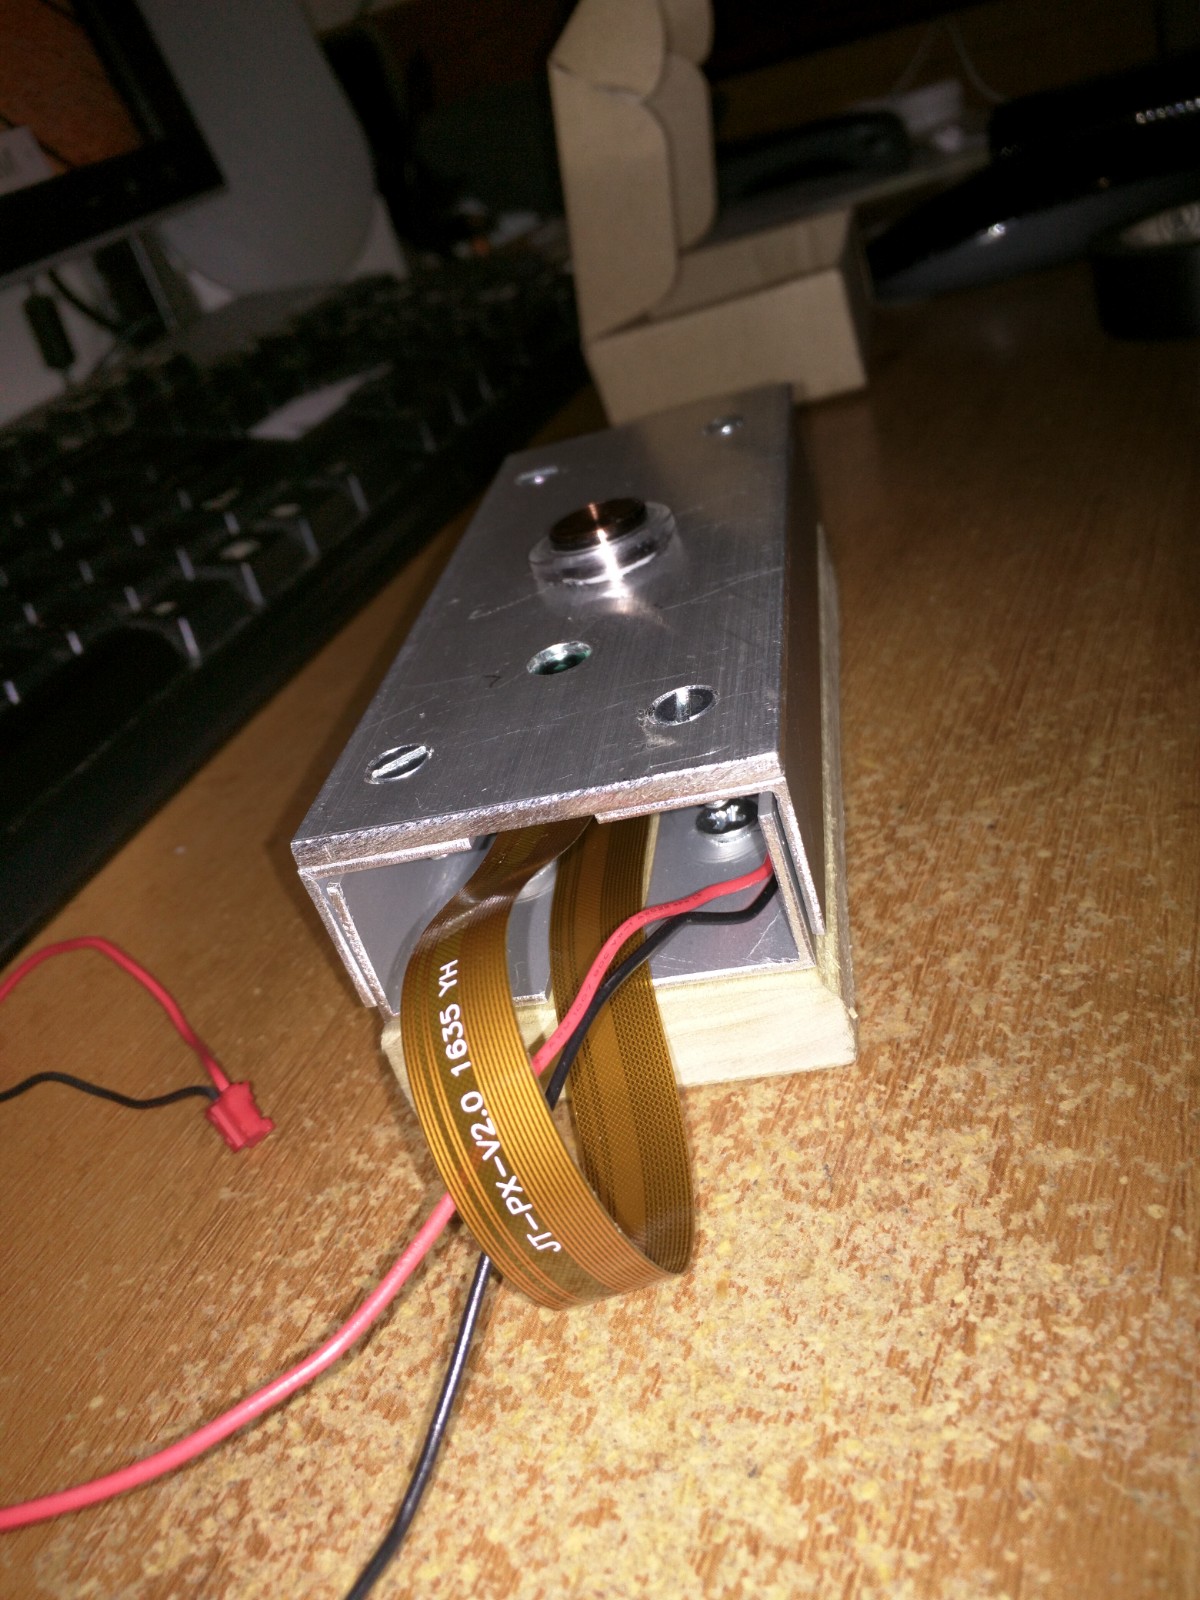
I have finally been able to pack all into one chassis and close it in.

  • Empty chassis
    Empty chassis
    Empty chassis
  • Added electronics and screws
    Added electronics and screws
    Added electronics and screws
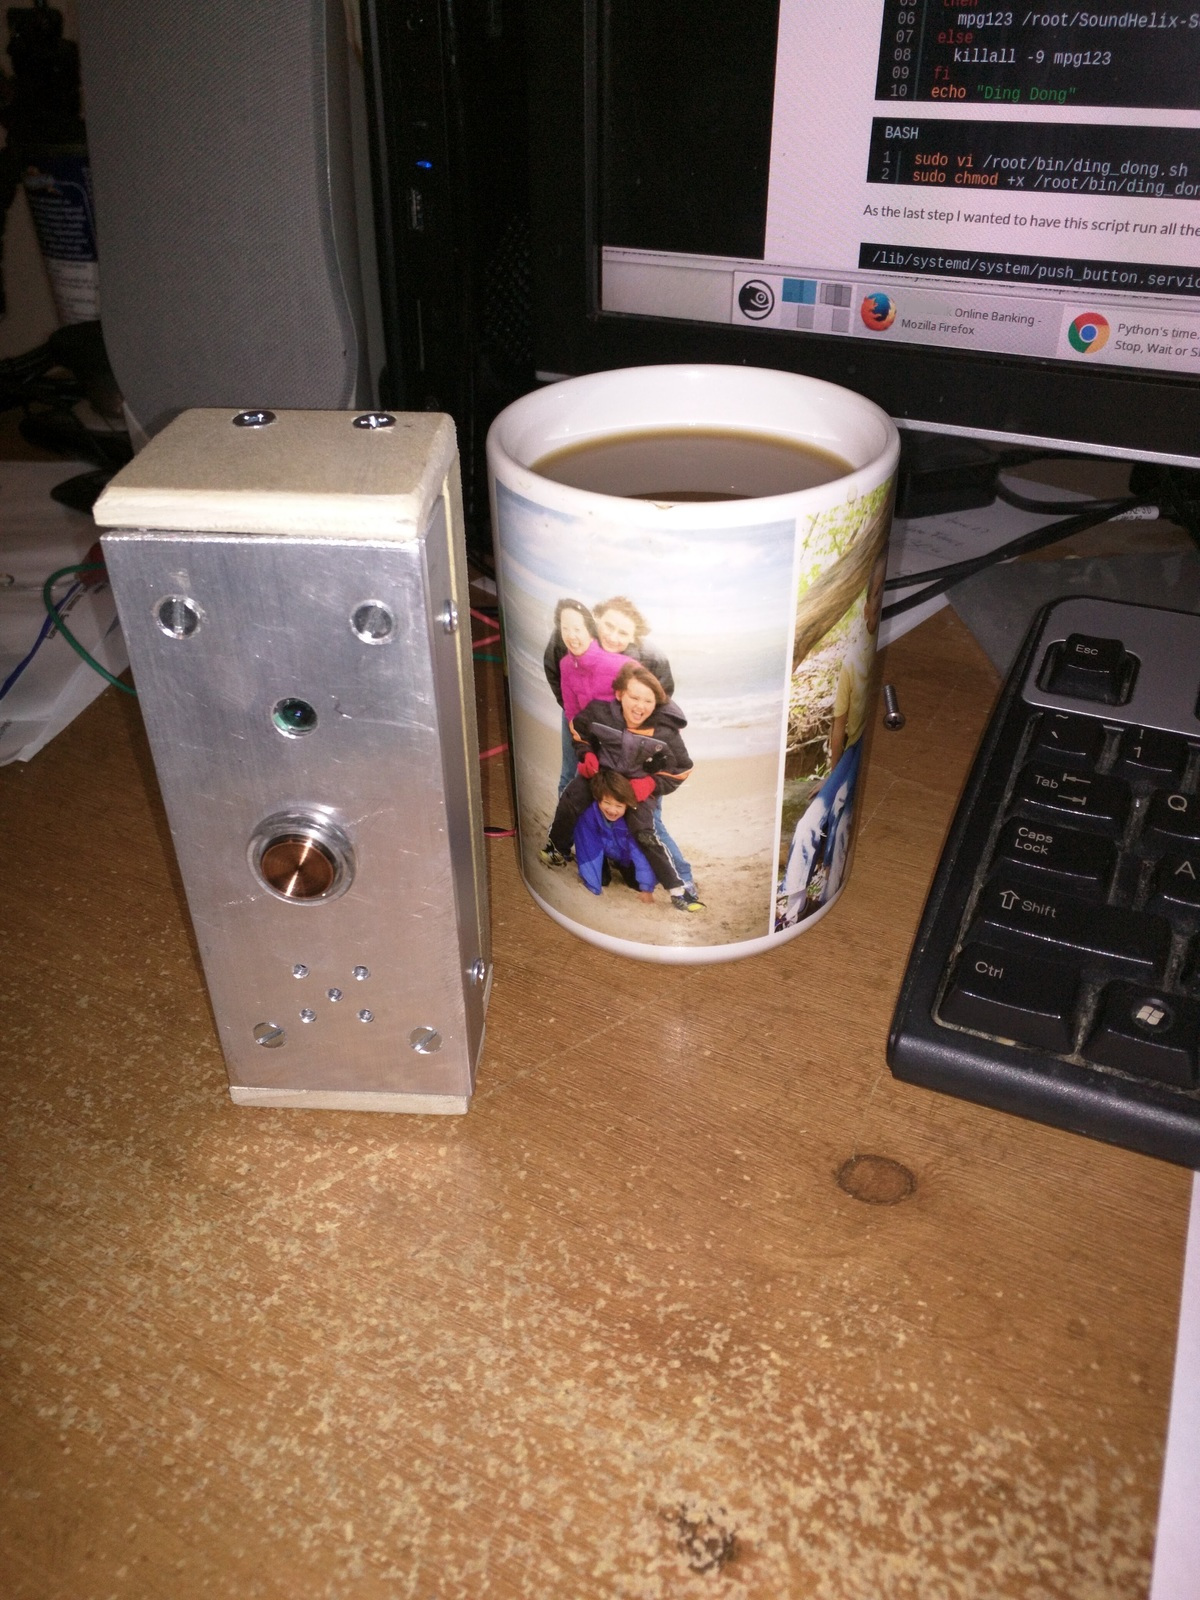
  • All enclosed
    All enclosed
    All enclosed

There are still a few items remaining …

  1. Add the microphone ( waiting for delivery )
  2. Properly configure WebRTC to connect from outside the home network.
  3. Write the Android / iOS apps to receive the notifications.
  4. Connecting our current wireless doorbell button to the back of the chassis.
  5. Spray paint the chassis
  6. Connecting the power source to the Video Doorbell
  7. Screwing it to the door.

I have prepared our existing doorbell button by adding two wires to overwrite the push button. These two wires will simply connect to the new button on our Video Doorbell. I will not need to worry about a power supply for this part of the system as it is powered by its own little battery. I will leave that battery in place as is.

The mechanical, and electrical challenges are nearly solved and the most important remaining bits are now in software.

Video Doorbell Software:

I created a placeholder for the required software pieces in GitHub.

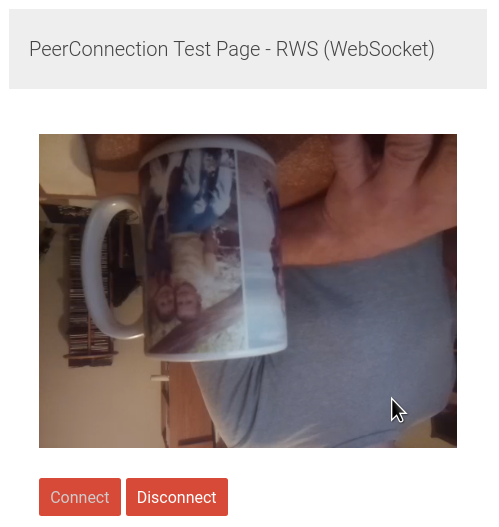
Below is a screenshot from the RPI-WebRTC-Streamer web page, connecting to the camera. I have found the connection to be quite unreliable and will have to make sure that there is a much more solid connection rate possible before I go ahead and expose the interface to the outside.

Once you connect you can see that the video is upside-down. That is due to wiring constraints, which forced me to mount the camera upside-down into the chassis. However this will be an easy fix in software.

Fun-fun-fun

Today I have weed my door as the previous wires were cut and left dead. Another unexpected surprise came when I realized that there are no remaining power outlets left in the basement.

So tomorrow I will have shut down the power to our basement, wire a power strip to a power hub and screw it into the wall.

Make some noise

Adding a push-button and connecting it up the a GPIO port is as simple as writing a tiny pyhon script to initialize the IO port for input and utilizing a built-in pull-Up button. The Raspberry PI button is then capable to act as a Doorbell button.

After I connected the loudspeaker to the USB soundcard and soldered the USB connection from the Raspberry PI to the sound card I was then able to use alsaconfig to select it and then use:

speaker-test -c2 -twav

to actually hear some audio through the soundcard.

External USB sound card

Now the next step was to connect GPIO port 17 to GND and use the built in bull-down-resistors to detect a button-press event.

Here is the push_button.py – python script which I use.

#!/usr/bin/python2.7

import time
import RPi.GPIO as GPIO
import subprocess

GPIO.setmode(GPIO.BCM)
GPIO.setup(17, GPIO.IN, pull_up_down=GPIO.PUD_UP)

def my_callback(channel):
    subprocess.call ( "/root/bin/ding_dong.sh" )

# add falling edge detection on a channel, ignoring further edges for 400ms for switch bounce handling
GPIO.add_event_detect(17, GPIO.FALLING, callback=my_callback, bouncetime=400)

while True:
    # Loop once a day
    time.sleep(24*60*60)

GPIO.cleanup()

This script is straightforward and is simply waiting for a button press on GPIO pin 17 ( to GND ). The final loop is a forever loop with a one-day delay which will help keep the responsiveness of the Raspberry PI button at a good level. If during this time a button press was detected, then the ding_don.sh – script, which in turn plays a sound on the speaker.

I plugged it into /root/bin/push_button.py and made sure it is executable

sudo mkdir /root/bin
sudo vi /root/bin/push_button.py
sudo chmod +x /root/bin/push_button.py

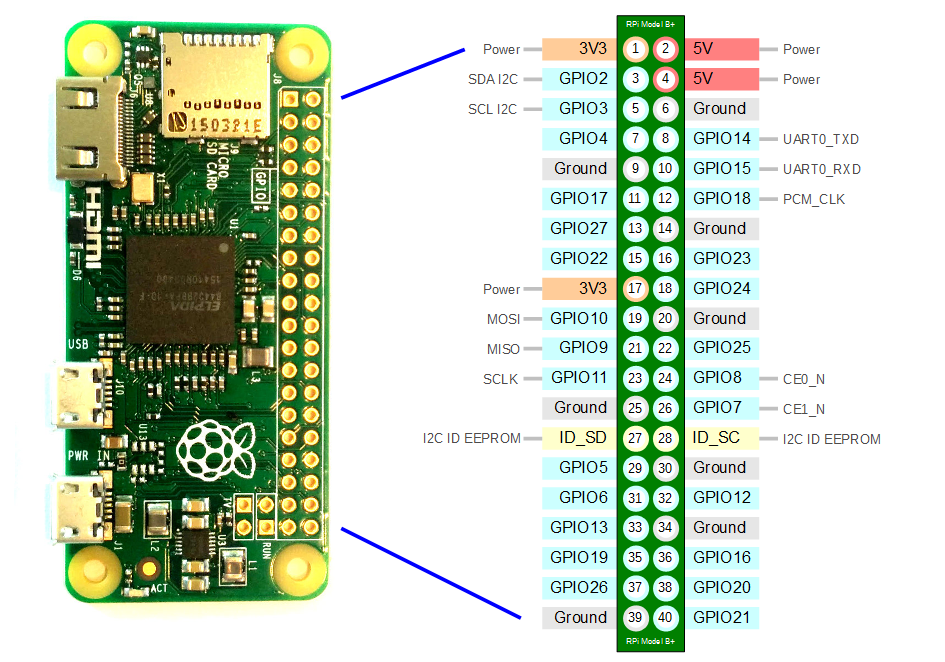
Below is the pin-out of the Raspberry PI Zero W.

GPIO Ports
Raspberry PI Zero W
GPIO ports

In this case I connected GPIO17 ( orange wire ) and GND ( blue wire ) ( PIN 11, and PIN 14 ) to the doorbell button.

Video Doorbell
Video Doorbell wired up

Instead of packing all the functionality into one python script I decided to have python call a simple bash – script to do the actual work. Here is the ding_dong.sh script, which is called by the python script and also resides in /root/bin/

#!/bin/bash

mpg=`pidof mpg123`
if [ "x${mpg}" == "x" ];
then
  mpg123 /root/SoundHelix-Song-14.mp3 &
else
  killall -9 mpg123
fi
echo "Ding Dong"

sudo vi /root/bin/ding_dong.sh
sudo chmod +x /root/bin/ding_dong.sh

As the last step I wanted to have this script run all the time and to make sure it is started at startup of the PI :

[Unit]
Description=Push Button Service

[Service]
ExecStart=/root/bin/push_button.py
StandardOutput=null

[Install]
WantedBy=multi-user.target
Alias=ipush_button.service
sudo vi /lib/systemd/system/push_button.service
sudo systemctl enable push_button

The Raspberry PI button is now all set to act as the Doorbell button for my Video-Doorbell project.

Wireless bridge with ASUS RT-N56U

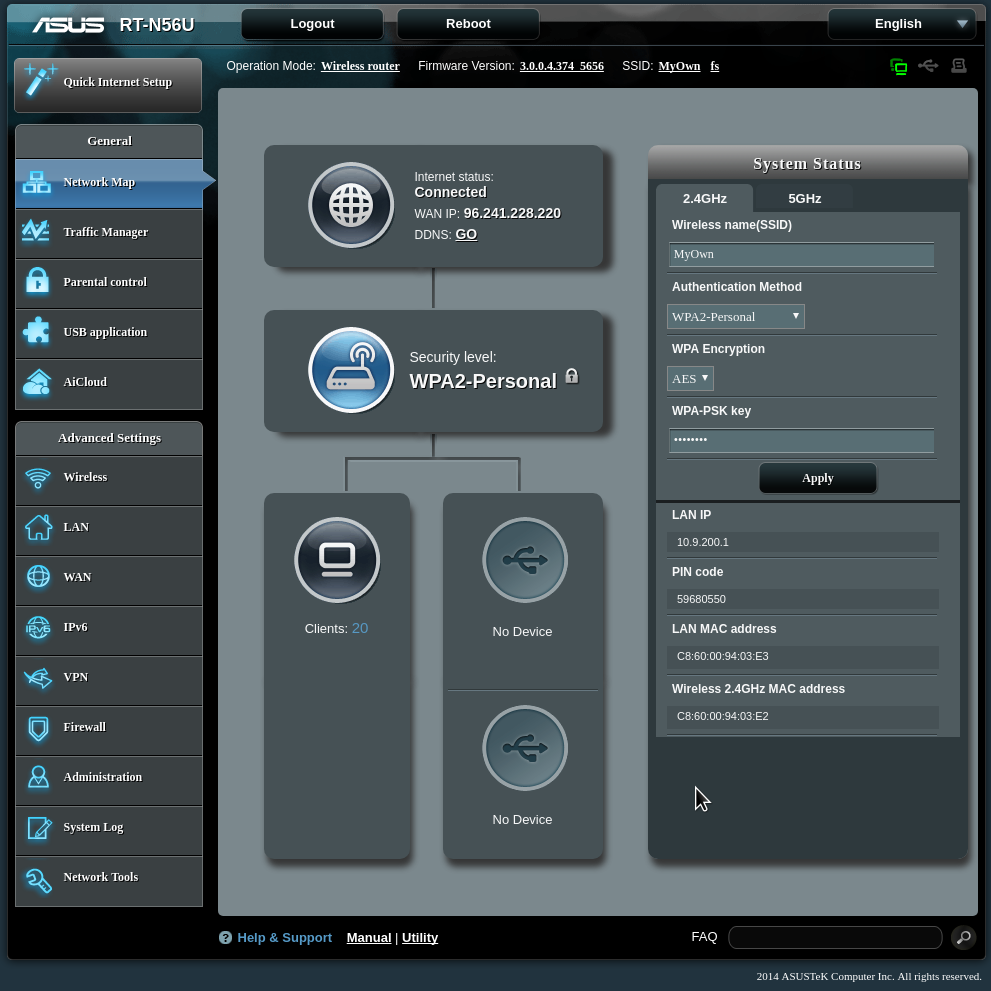
I have had the ASUS RT-N56U for the past 4 years instyalled in my home and it is serving me very well. This is a dual-band wifi router which has been on the market since 2011. It offers a lot of things which go beyond the basic wi-fi functionality.

Wifi Router ASUS RT-N56U
Asus Dual-Band Wireless-N600 Gigabit Router (RT-N56U)

Original Firmware
Original Firmware for the RT-N56U

The configuration panel of the original bios on this device looks just gorgeous. The functionality which you have built into this device is amazing and Asus is still popping out some firmware and security updates once in a while.

last week I saw that some one in our neighbourhood gava away a free wi-fi router and as it turned out it was the same exact model. So I went ahead and recovered it to install as a wi-fi extender in our house.

Now configuring the second router to act as a wireless bridge was a snap. After I provided all the login information setup the second band to handle exclusively the relay traffic and … nothing.

Wireless Bridge setup

I spent a few hour tinkering with the settings and ended up empty. I tried different channels, open wifi ( not recommended ) and more. My final thought on this was “At least I did not spend any money on it..

However that was not the end of it. I searched for alternate firmwares for this router and found the Padavan & N56U Firmware. So I went ahead and installed it onto the router. the worst that could happen was that I bricked a device which I had no other use for anyways.

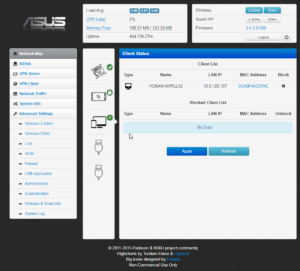
Afterwards configuring the access point information was straight forward with one major difference. It actually worked without any issues right off the bat. So now thatnks to the two ASUS RT-N56U – units I have wifi connectivity throughout my house and into our backyard.

Padavan Firmware interface


Custom Video Doorbell box

When I first <a href=”https://www.softwaresamurai.org/2017/10/10/raspberry-pi-video-doorbell/”>looked into adding a Video Doorbell</a> I was surprised by the lack of available choices ( thus far )

Our doorbell had to be slender which meant less than 2″ ( 50mm ) and could be 4.8″ tall ( 123mm ). None of the ones I saw met this criteria. I also required a little 5mm shim to handle the uneven surface.

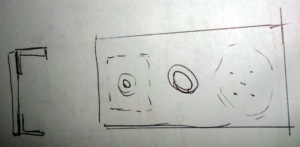
Anyways long story short I decided to do a custom build of the chassis for the Doorbell.

Rough drawing of the chassis

Creating the Custom Video Doorbell:

To convert this image into a physical reality I had to use some tools and then see if all eventually fits in. To screw the top and the bottom together will be the very last step before painting, after I have places, screwed, soldered and glued all the pieces into their final place. This will allow me to adjust the height if needs be.

From the pictures below you can see that it is a tight fit with all the pieces in place. Unfortunately I can’t use the USB plugs. If I would connect them, then the PI Zero would no longer fit inside the box.

Since the PI Zero exposes the usb contacts on the bottom and I have to remove the USB plug from the soundcard anyways.

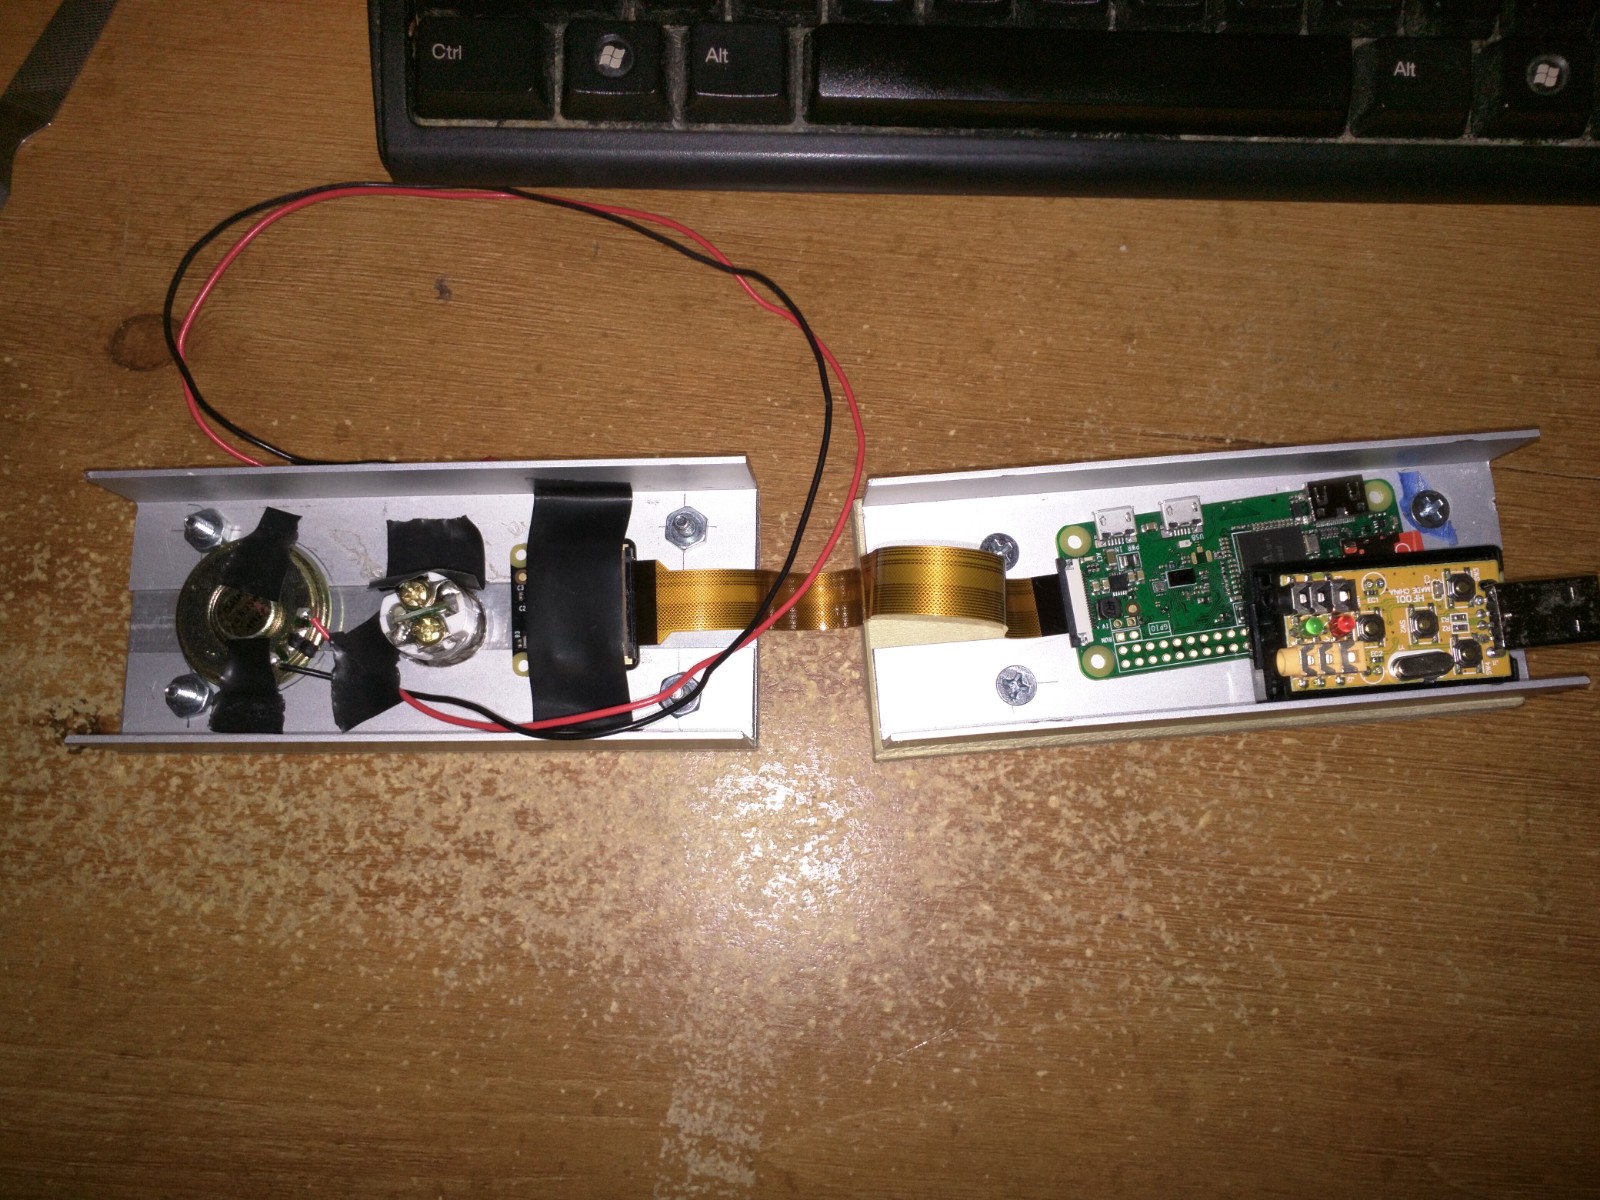
  • All pieces put tgether
    All pieces put tgether
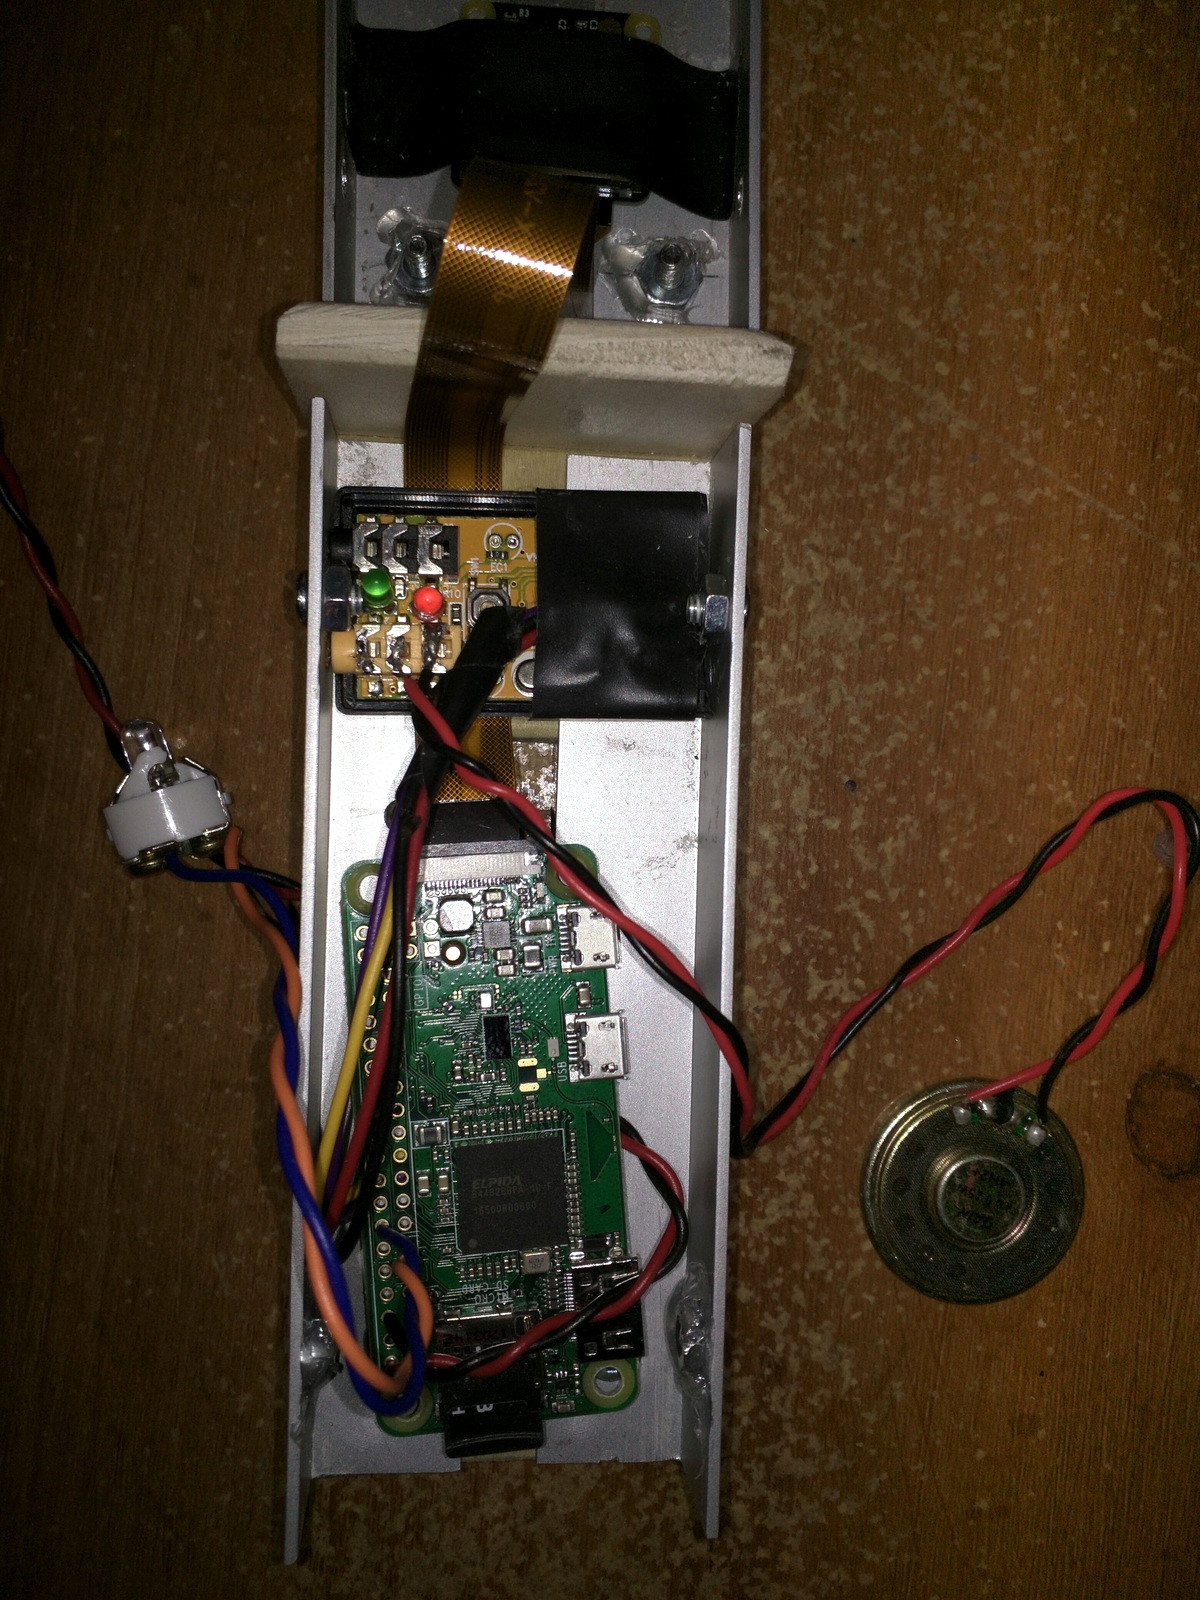
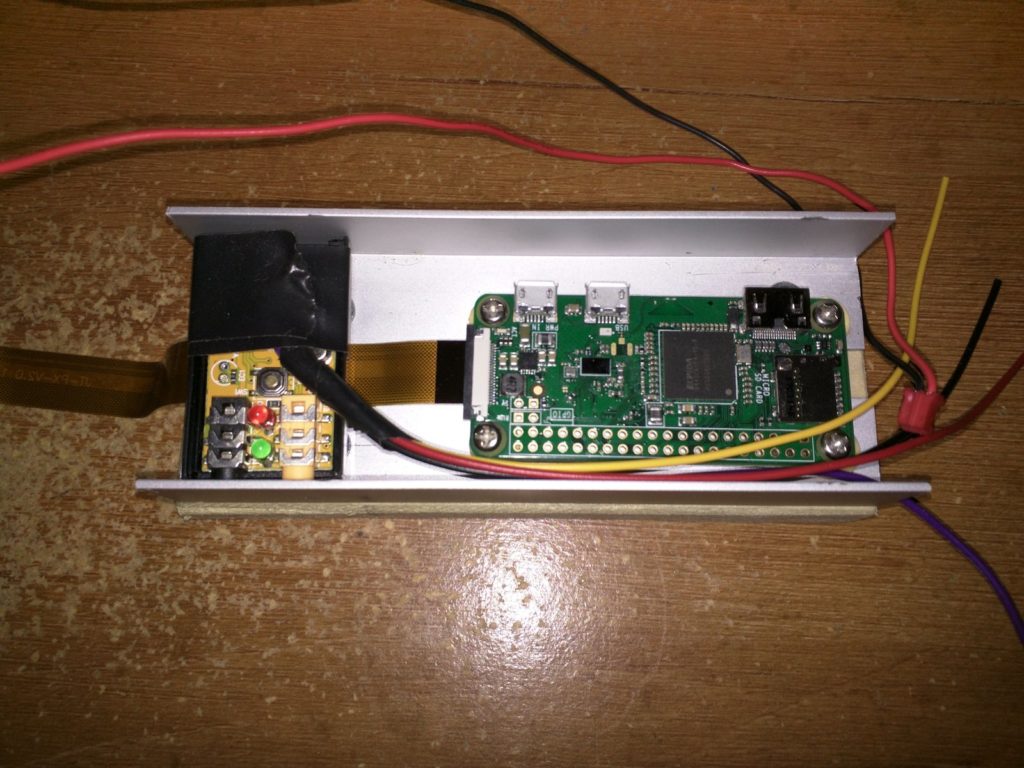
    This is the assembled Raspberry PI with camera, the New doorbell button, the sound card, loudspeaker, as well as the original wireless doorbell button.
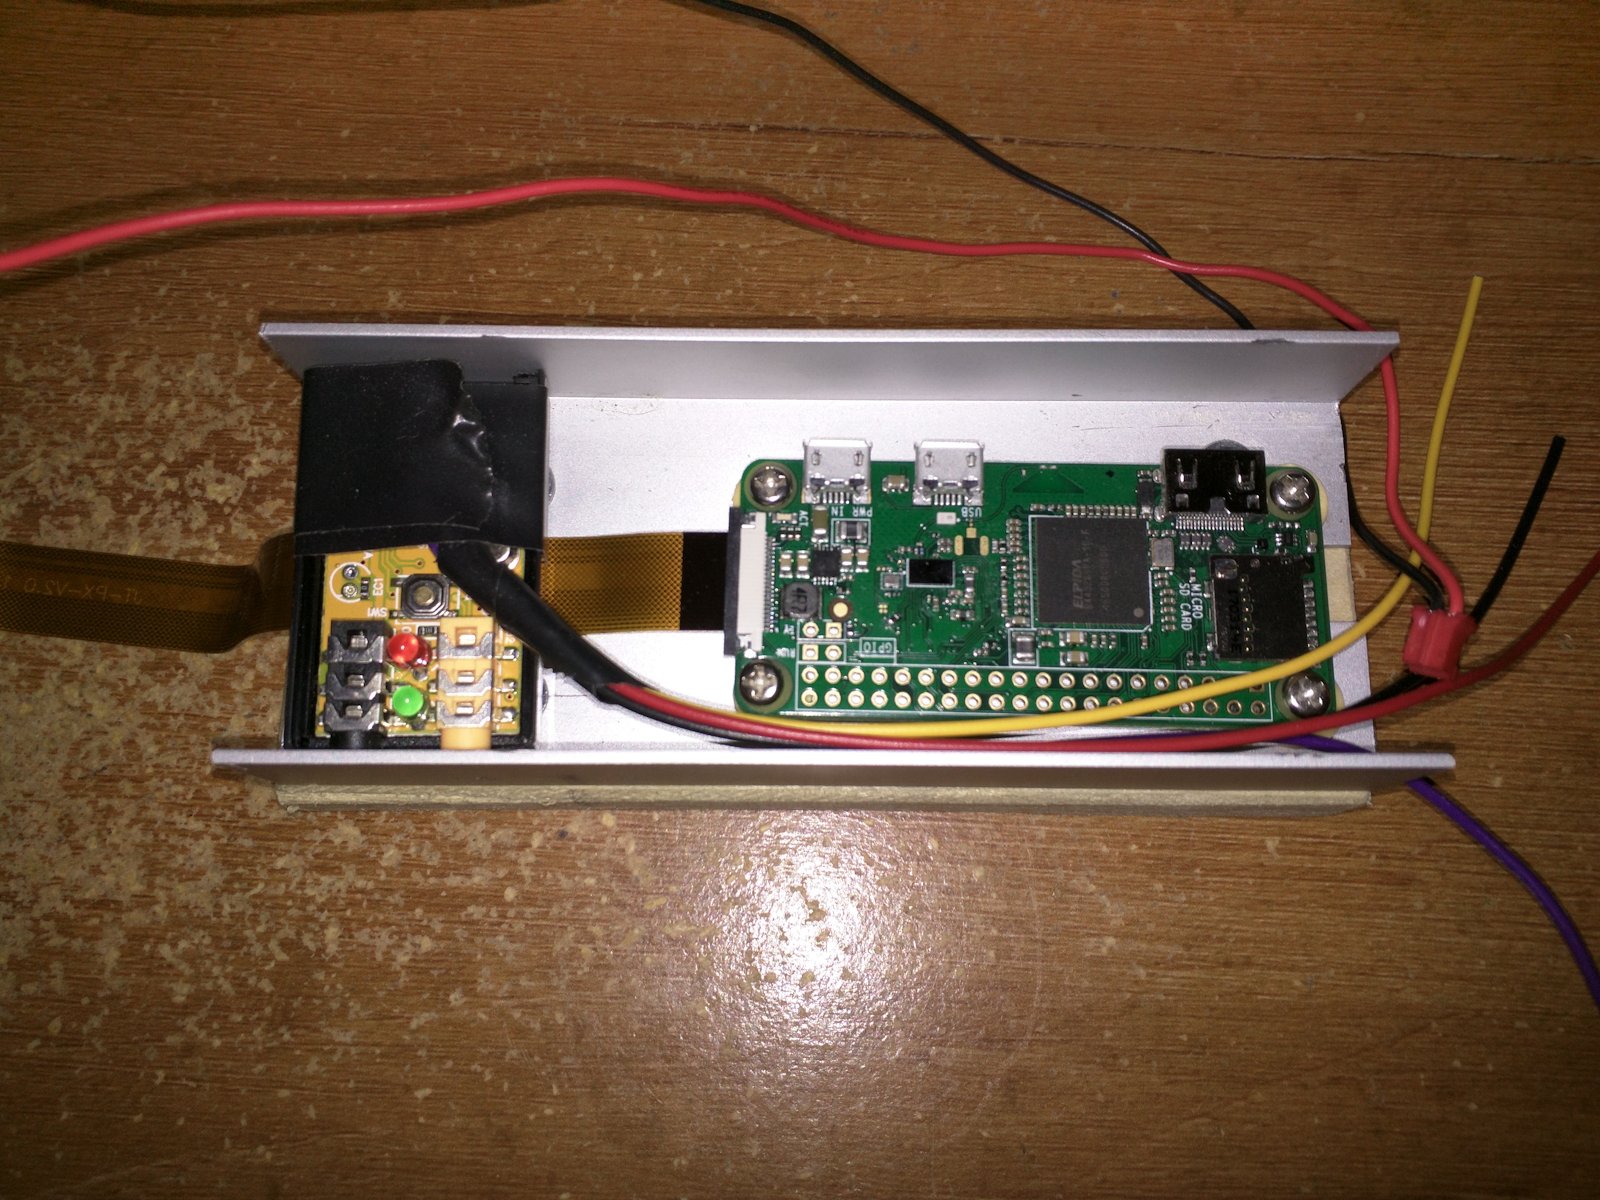
  • Side View
    Side View
    The assembled pieces from the side
  • top and bottom part of the doorbell
    top and bottom part of the doorbell
    Please note that the tape is just a temporary holder until I create all required holes, brakets etc.
  • The sound card fits in sidewards
    The sound card fits in sidewards
    After removing the USB plug and soldering on the wires, The sound card does now fit sidewards into the chassis.
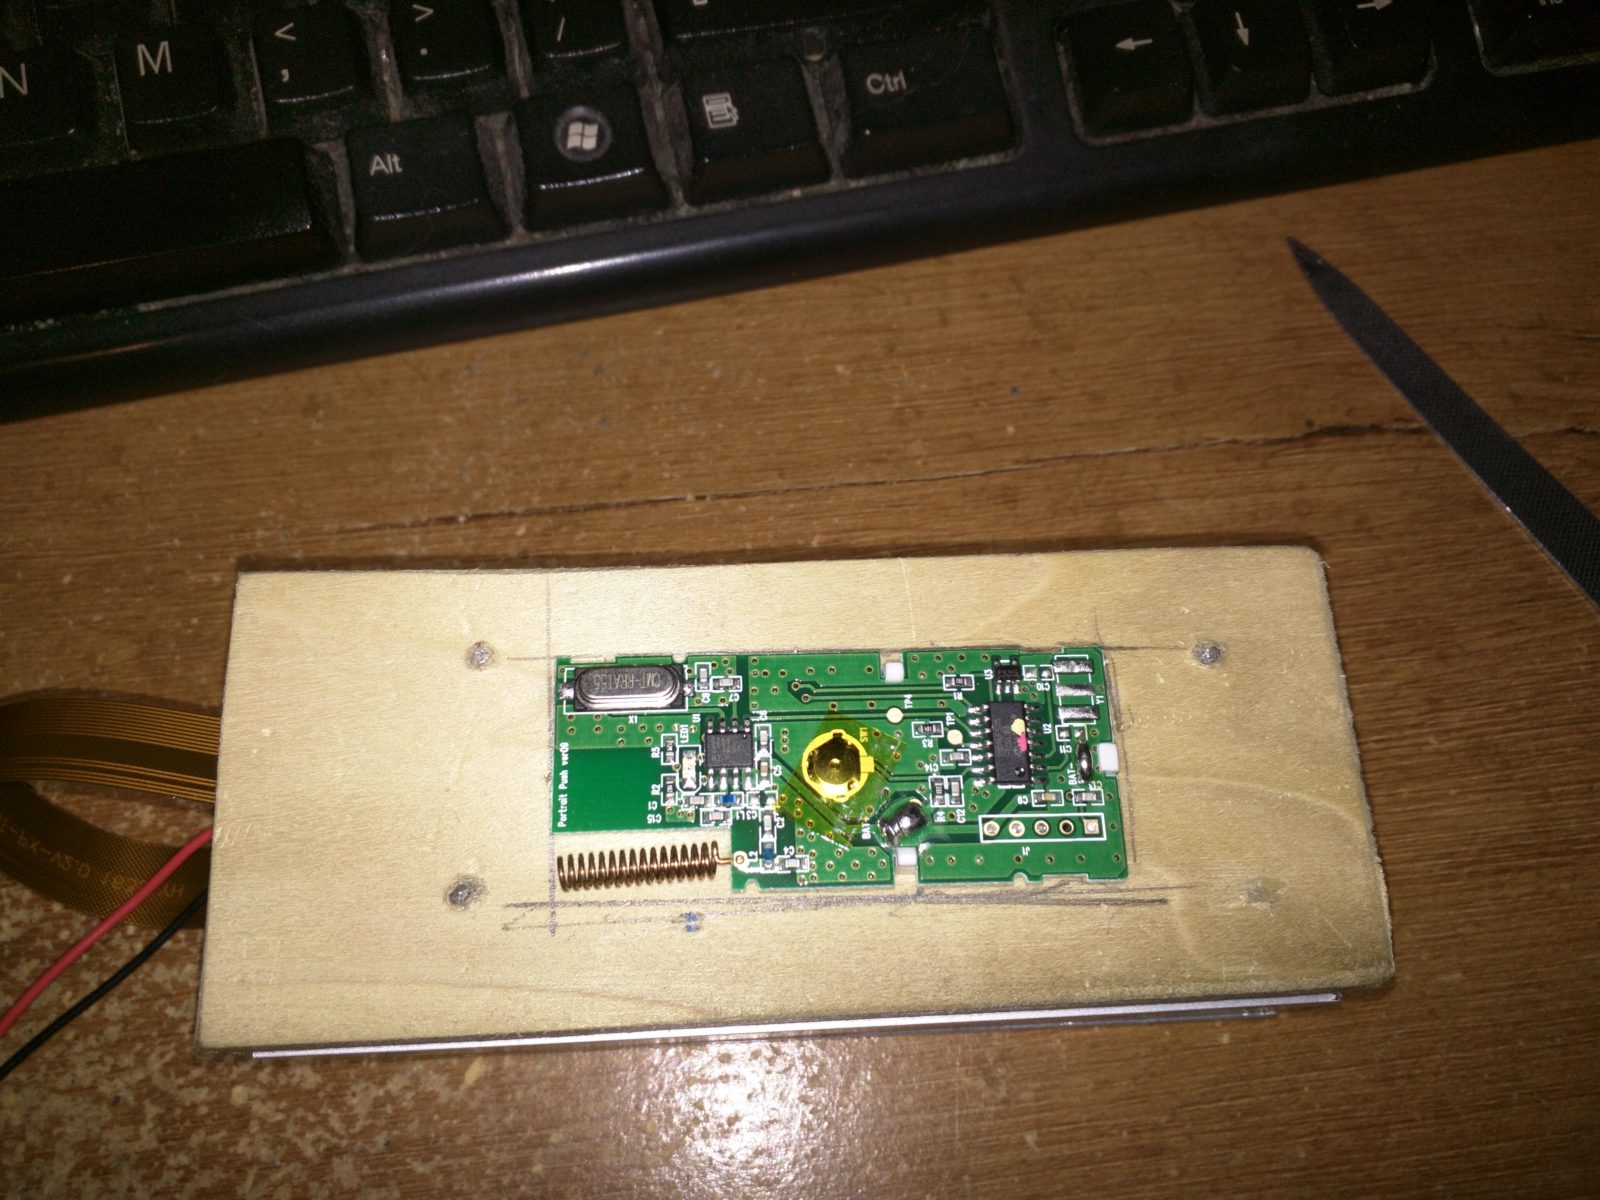
  • Wireless Doorbell button
    Wireless Doorbell button
    Before cutting out the back to place the current wireless Doorbell Button into its socket.
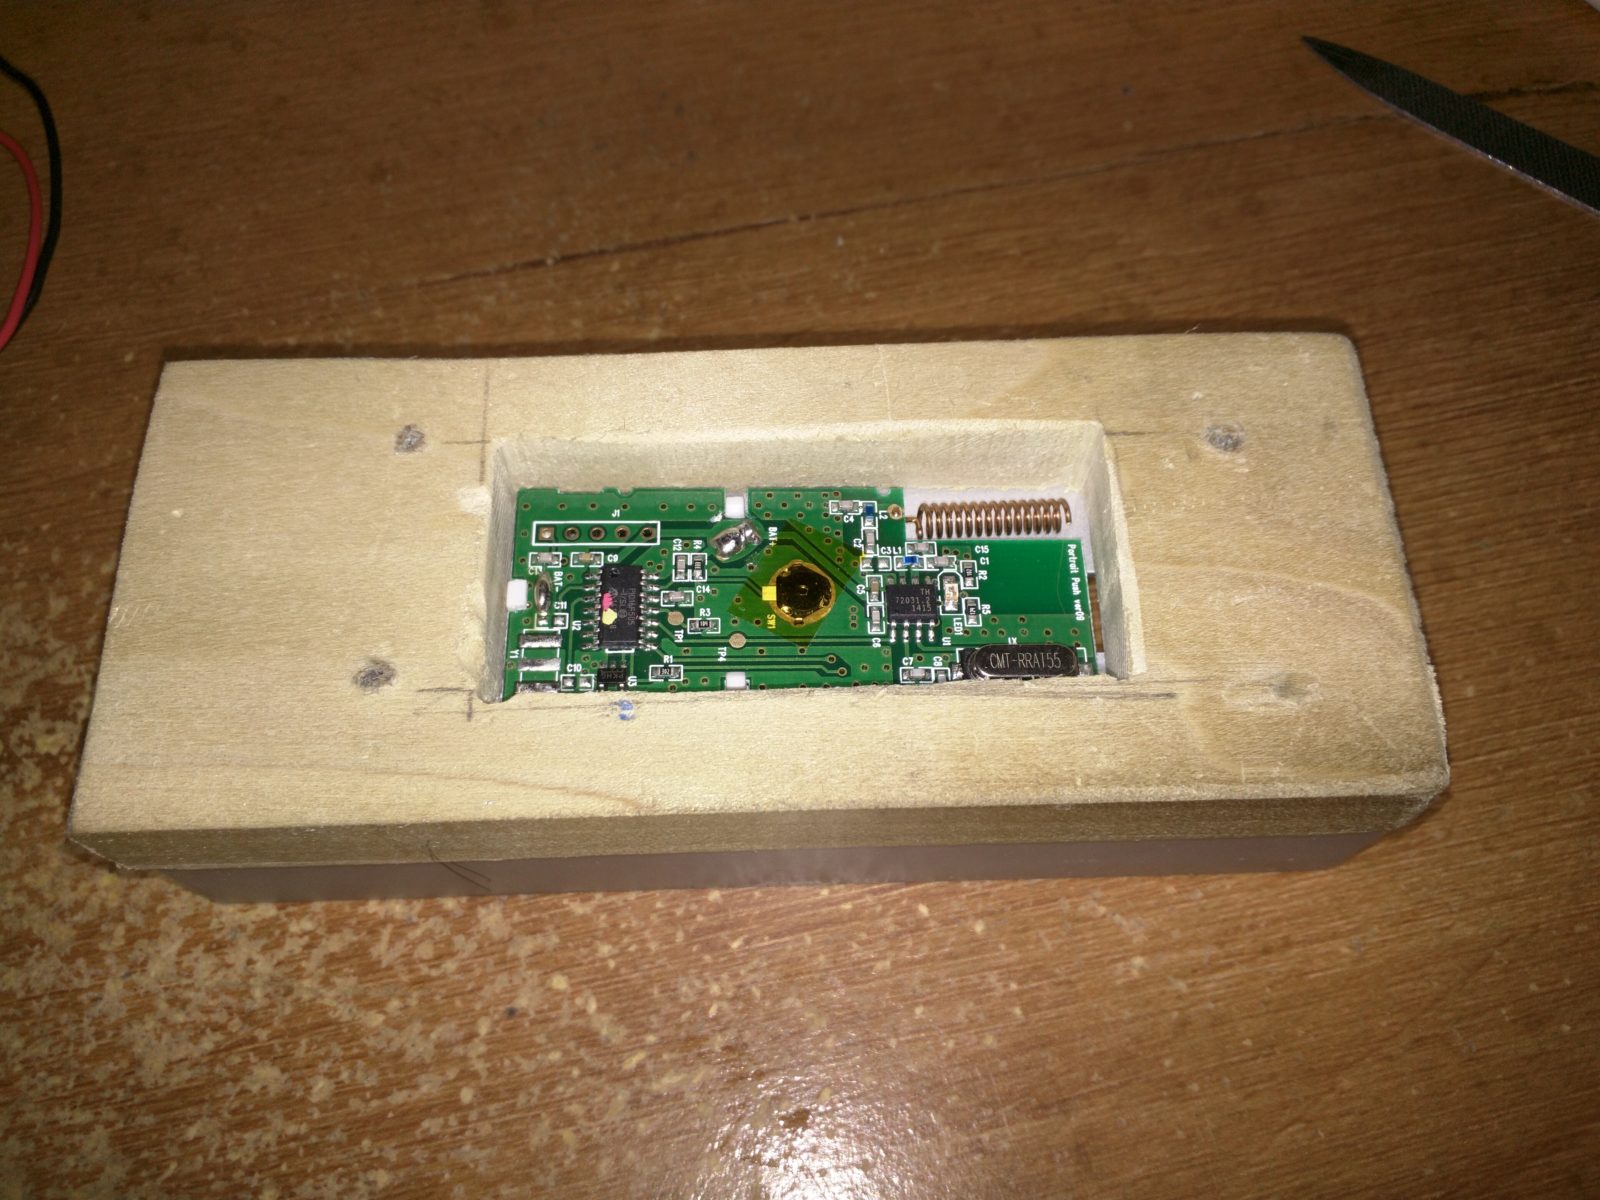
  • Wireless Button integrated into back of Doorbell
    Wireless Button integrated into back of Doorbell
    All fits snug into their place.


Power

As power source we do have 24V AC coming out of the doorframe, which require a small power converter. Using the standard 7805 regulator brings this down to a few small pieces. Alternatively I can find the source fo the wiring and feed it directly with 5V DC to the door.

7805 voltage regulator
7805 voltage regulator schematic

Things are starting to come together. I still have to connect the loudspeaker, the microphone, and make sure that the original doorbell button gets some protection before connecting it up and closing the case.

Rpi WebRTC Streamer to Android WebRTC streaming

In this article I will setup Android WebRTC streaming to RPI-WebRTC-Streamer running on my Raspberry PI Zero W, to talk to each other.

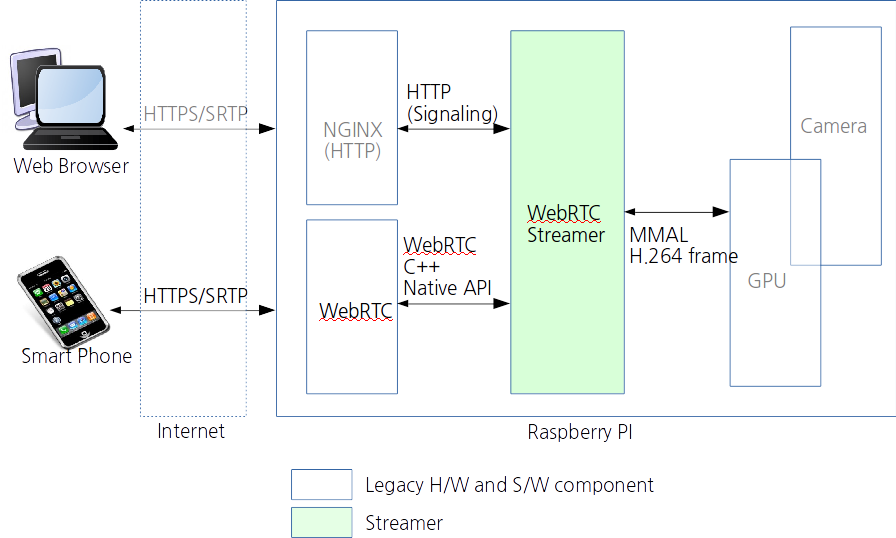
Here is the architecture of RPI-WebRTC-Streamer.

Now why do we use WebRTC instead of directly streaming audio/video through a socket from the Raspberry PI to the Android device ?

It is helpful to understand how WebRTC works under the hood and how a connection is established.

The magic in WebRTC is the probing of the connection to allow two clients to talk P2P ( Peer-to-Peer ), even if they are behind a firewall or using NAT. There are plenty of online resources devoted to this complex topic ( E.g. https://www.html5rocks.com/en/tutorials/webrtc/infrastructure/ )

The basic steps in establishing a WebRTC connection are:

  • Step 1: Signaling: both peers connect to a signaling server (using websockets over 80/443, comet, SIP,etc..) and exchange information (about their media capabilities, public IP:port pairs when they become available, etc.)
  • Step 2: Discovery: Devices connected to LAN or mobile networks are not aware of their public IP (and port) where they can be reached at so they use STUN servers located on the public Internet to discover their ip:port pair (ICE candidates). In the process they punch a hole through the NAT/router which is used in step3:
  • Step 3: P2P connection: once the ICE candidates are exchanged through the initial signaling channel each peer is aware of each other’s ip:port (and holes have been punched in NATs/routers) so a peer to peer UDP connection can be established.
  • Step 4: If a P2P connection can’t be established ( maybe through firewall rules or the usage of Symmetric NAT ) then TURN servers can be used, which will relay the data between the peers. Please note that this will require the TURN server to receive and send all video and audio and is the last resort in WebRTC.

Under normal circumstances you would establish the connection between two web-browser. However in this case I need to establish Android WebRTC streaming to the Raspberry PI Zero W. Fortunately we have the required tools and libraries available on both platforms and can take full advantage of this technology stack. This allows us to basically build a video conference similar to skype between the Raspberry PI and Android. As an aside, iOS can also handle WebRTC, which may be a project for later.

Android WebRTC Streaming:

  1. Lets first make sure you have the RPI WebRTC Streamer setup, as explained in my previous post.
  2. Then you have to install ADB onto your computer to be able to transfer the App to your Android phone.
  3. Connect your Android phone to your computer and make sure you have the developer option enabled
  4. Next get the source code for RPI WebRTC Streamer from github and install it onto your phone, like so.
    bash> git clone https://github.com/kclyu/rpi-webrtc-streamer.git
    bash> cd rpi-webrtc-streamer/misc
    bash> adb install AppRTCMobile.apk
    
  5. Next open the app on your Android phone
  6. Change settings of the Video encoder to H264 High
  7. Change the resolution to VGA(640 x 480)
  8. And then simply enter the IP address of your raspberry PI as the room number

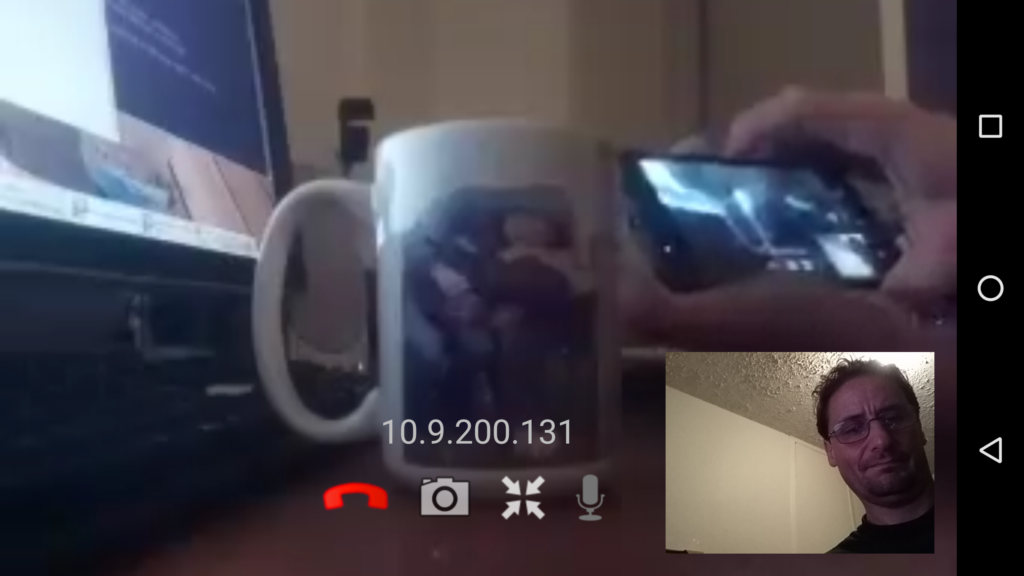
Android WebRTC streaming in action

Finally, here is the article from mpromonet if you ever feel like compiling rpi-webrtc-streamer https://www.raspberrypi.org/forums/viewtopic.php?t=186271.
You can even use docker containers to make things easier: https://hub.docker.com/r/mpromonet/webrtc-streamer/

As an aside, I found multiple Android app templates to use WebRTC

uv4l WebRTC vs rpi-webrtc-streamer

I have spent the past two days working with the uv4l driver to get WebRTC working. I eventually got everything to work with three major issues

  1. I could not get the transmitted quality to anything close to what I needed
  2. I could not get rid of the the watermark which was put over the video
  3. The complete CPU utilization for 640×480 was above 90% and caused issues.

Another slightly annoying issue was that I had to re-install Jessie after I found out that uv4l is currently not available for Raspbian stretch lite. I could only find the full version for Jessie, which requires at least a 8GB microSD card. And off I went to replace my 4GB microSD card.

On the positive side I installed rpi-webrtc-streamer from github and was able to look at the results in realtime right away.

Unlike uv4l, which is based off OpenWebRTC from Ericson, rpi-webrtc-streamer is based off the Native Code from www.WebRTC.org which seems to be a bit more responsive than uv4l.

Here are the steps I had to do to get things to work.

bash>  # First create a home for the code
bash>  mkdir utils && cd utils
bash>  git clone https://github.com/kclyu/rpi-webrtc-streamer.git

You can find the Android App under rpi-webrtc-streamer/misc/AppRTCMobile.apk
But first lets avoid the work and go straight to installing the software.

Go to https://github.com/kclyu/rpi-webrtc-streamer-deb and download the appropriate deb-package.

bash>  dpkg -i rws_xxx_armhf.deb
bash>  sudo systemctl start rws

Then simply point your browser at http://<IP Address>:8889/native-peerconnection/

Raspberry PI camera
Raspberry PI camera

I will be going through the setup and usage of the Android App which is part of rpi-webrtc-sstreamer in one of my next blog entries.

Cheap $7,- external usb sound card

I bought the following external usb sound card from Amazon for $7,- to integrate into my Video Doorbell project.


External USB sound card

So why did I chose to go this route. Simple, I was looking at some audio pHATs  for the Raspberry PI and found that they will cost about $4,- a pop, then of course you also need a microphone, and bang you are at around $9,- to $10,-. So paying $7,- for a audio I/O ( 7.1 sound card ) is a smart choice. Another thing I saw which won me over was that the setup is quit simple.

Note: This link above will point to the same sound card for only $4,-.

In order to do the setup I connected a micro-USB male to USB female adapter to my PI zero and made two small changes.
Please note though that I do intend to remove the USB plug all together and solder things together in the final setup.

1: Find the US sound card number ( in my case the USB card is card # 1 )

aplay -l
**** List of PLAYBACK Hardware Devices ****
card 0: ALSA [bcm2835 ALSA], device 0: bcm2835 ALSA [bcm2835 ALSA]
Subdevices: 8/8
Subdevice #0: subdevice #0
Subdevice #1: subdevice #1
Subdevice #2: subdevice #2
Subdevice #3: subdevice #3
Subdevice #4: subdevice #4
Subdevice #5: subdevice #5
Subdevice #6: subdevice #6
Subdevice #7: subdevice #7
card 0: ALSA [bcm2835 ALSA], device 1: bcm2835 ALSA [bcm2835 IEC958/HDMI]
Subdevices: 1/1
Subdevice #0: subdevice #0
card 1: Set [C-Media USB Headphone Set], device 0: USB Audio [USB Audio]
Subdevices: 1/1
Subdevice #0: subdevice #0

2: create a file /etc/asound.conf with the following contents

pcm.!default {
        type hw
        card 1
}

ctl.!default {
        type hw
        card 1
}

3: and finally test the speaker :

  speaker-test -c2 -twav

This concluded the setup and testing. To use this external USB sound card in my project it had to fit tightly into the chassis which I built from scratch. So the USB plug had to come off and I had to solder some wires onto the card to connect t up to the Raspberry PI.

Video Doorbell assembly
external USB soundcard after removal of USB plug

Raspberry PI Zero W as Chromecast

So one of the thing which I tried out was to see if the PI Zero can handle video streaming to our TV.

In order to setup the Raspberry PI Zero W as Chromecast, I followed the series of 7 videos below and plugged it into our large TV. However the result was unusable. The video did only play for a second or two before the whole thing stopped and tried to continue playing.

This is not too surprising considering that the PI Zero has only a single core 1GHz CPU while the instructions assume the PI 2 or 3 which has a quad core CPU to handle the stress.

Step 1 : Raspbian Jessie Lite Install Guide
https://youtu.be/R9UDL1JxP7I

Step 2: Raspbian Jessie Lite wifi config
https://youtu.be/N2ZjrBC2bv0

Step 3 : Raspbian update upgrade omxplayer
https://youtu.be/JV7nbAsQKO0

Step 4 : Install youtube download video and python
https://youtu.be/ukujbwn7XiQ

Step 5 : Raspbian Jessie Lite Golang
https://youtu.be/gVhMYRaKGXU

Step 6 : Raspberry pi as Youtube TV
https://youtu.be/dWjfkwz6MWk

Please feel free to sign up or follow my home made hardware projects here …

Loading

Raspberry PI Video Doorbell

I recently went to a Microcenter near by and bought an Raspberry PI Zero W

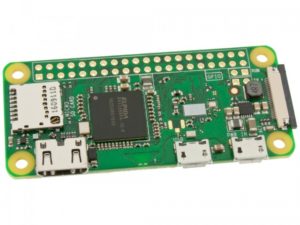
Raspberry Pi Zero W
Raspberry Pi Zero W

For $5,- I could simply not resist. Not only is this a full blown computer with micro-hdmi out, it also can be used to connect other hardware to it with ease. The connector on the right is there to connect a camera to the PI Zero.
Well, after installing raspbian onto a micro-SD card, I went ahead and bought a camera as open-box item for only $12,- and got the combo to work in no time flat.

That is all well and good but what can you truly do with this hardware ? The answer for me is/was

Home Automation.

I have looked into

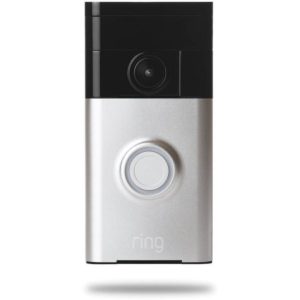
Ring Video Doorbell
Ring Video Doorbell

However my issue was not so much the price of these devices, after all it takes a lot of effort and money to develop a great product, it was the physical shape and size which made any of the available products unusabe for me.

So I thought I would simply add a few pieces together and create my own Video Doorbell from scratch using the PI and a few other software and hardware parts, which can be found online.

It is of course very helpful, that there is such a huge community behind the PI and that almost everything you can come up with has been attempted before. So googling around I found a bunch of sites with similar goals, like this one here.

Raspberry Pi Security System

Here are the next steps to get from idea to finished project.

  1. Building the chassis ( and BOM )
  2. Connecting the camera
  3. Adding microphone and speaker
  4. Installing a notification server ( pushd )
  5. Writing a cross platform app ( iOS / Android )
  6. Connecting all the pieces

Feel free to subscribe to my blog

Loading